
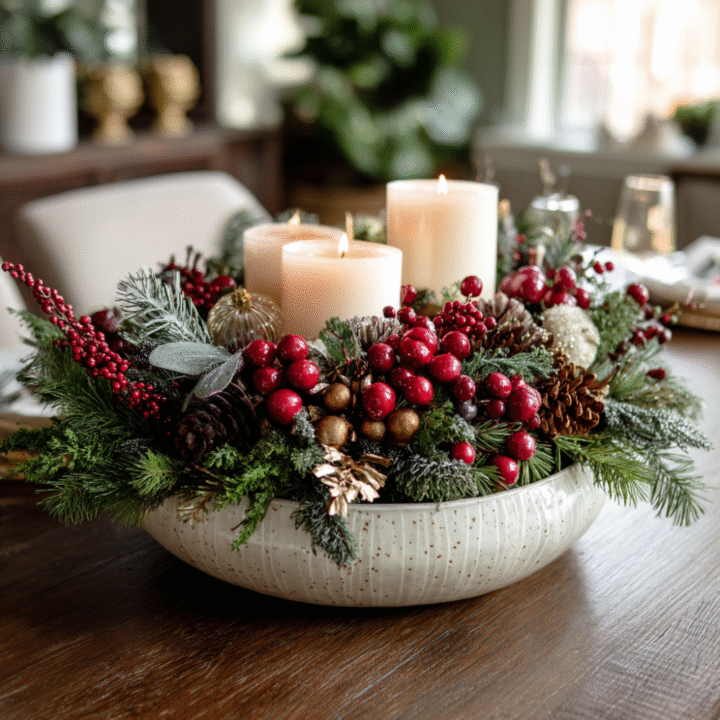
Let’s be honest — winter decorating is basically an excuse to make your house look like a snow globe without the freezing temperatures. ❄️✨
If you’ve ever looked at those dreamy “Winter Wonderland” tablescapes on Pinterest and thought, “Yeah right, I don’t have time (or a team of elves) for that,” I’ve got good news: you totally can pull it off — yourself, in less than an afternoon, and without maxing out your credit card.
I’m going to walk you through some Winter Wonderland centerpiece ideas you can DIY that are actually doable. They’ll make your table, mantel, or entryway sparkle like fresh snow — without the stress. Ready to channel your inner holiday designer? Let’s do this.
Why Winter Wonderland Décor Works Every Time
Ever notice how the phrase “Winter Wonderland” instantly makes you feel calm and cozy? There’s a reason. It’s all about soft light, sparkling textures, and natural details that mimic that magical first snowfall.
And the best part? You can adapt it for Christmas, New Year’s, or just winter in general. So even after the holiday madness fades, your table still looks stunning well into February. (No awkward “Do I take this down yet?” moment.)
Before You Start: The Winter Wonderland Vibe
Before diving into the DIYs, let’s talk vibe.
Think white, silver, glass, light blue, and a little greenery. Basically, if Elsa would approve, you’re on the right track.
Pro Styling Tips
- Stick to two or three main colors — like white, silver, and evergreen.
- Mix textures: glass + wood, matte + shimmer, faux fur + metallics.
- Use different heights — a tall candle, a short jar, and some scattered accents.
- And always, always add something that sparkles.
Alright, let’s get crafting.
1. Frosted Jar Candle Centerpiece
Time: 20 minutes
Skill level: Beginner (a.k.a. anyone with hands)
You’ll need:
- Mason jars or old candle jars
- Epsom salt (yep, the stuff from your bathroom)
- Mod Podge or craft glue
- Tea lights or small candles
- Ribbon or twine
How to make it:
- Brush glue on the outside of the jar.
- Roll it in Epsom salt — it instantly looks like frosted glass.
- Tie a ribbon or twine bow around the rim.
- Drop in a candle and light it up.
That’s it! The glow through the “snowy” glass is pure magic.
Why I love it: It looks like something you’d buy at Pottery Barn, but it costs maybe $3. Plus, it’s reusable — change the ribbon color for Valentine’s or spring décor later.
2. Snowy Branch Centerpiece
Time: 25 minutes
Vibe: Forest fairy meets minimal chic
You’ll need:
- Bare tree branches (go outside and grab some!)
- White spray paint or faux snow spray
- A vase or tall jar
- Optional: glitter spray, fairy lights, or hanging ornaments
How to make it:
- Spray paint your branches white. Let dry.
- Place them in a vase filled with Epsom salt or small pebbles.
- Drape mini LED lights or hang crystal ornaments for sparkle.
Pro tip: Group three vases of different heights for that “designer” look.
Why it works: It’s simple, dramatic, and fits any winter setting — dining table, mantel, or even an office desk.
3. Glass Bowl Snow Scene
Time: 30 minutes
Vibe: Cozy snow globe without the shaking
You’ll need:
- Large glass bowl or trifle dish
- Faux snow or Epsom salt
- Mini houses, reindeer, or bottle-brush trees
- Optional: battery-operated LED tea lights
How to make it:
- Pour in your “snow.”
- Arrange your tiny trees and figurines.
- Add LED candles for that glowy “it just snowed” effect.
FYI: You can use whatever mini décor you have — pinecones, ornaments, even old Christmas village pieces.
Personal note: I made one of these last year with fake snow, two mini houses, and fairy lights. My sister legit thought I bought it from a boutique. (Nope — just me, a glue gun, and 20 minutes of ambition.)
4. Mirror Tray & Candle Centerpiece
Time: 15 minutes
Vibe: Elegant, romantic, easy
You’ll need:
- A mirror tray (or any tray with reflective surface)
- Pillar candles in white or ivory
- Silver ornaments or crystal beads
- Greenery sprigs (optional)
How to make it:
- Arrange candles of various heights on the tray.
- Scatter ornaments or beads around the base.
- Add a few greenery sprigs for texture.
When the candles are lit, the reflection doubles the glow — it’s basically instant ambiance.
Why it’s a go-to: It’s foolproof and adjustable. You can make it elegant, rustic, or glam just by swapping out accents.
5. Winter Woodland Lanterns
Time: 25 minutes
Vibe: Cozy cabin in the snow
You’ll need:
- Lanterns (or tall glass vases)
- Pinecones, faux snow, and small ornaments
- LED candles or fairy lights
How to make it:
- Fill the bottom of the lantern with faux snow.
- Layer in pinecones and ornaments.
- Nestle your LED candle or fairy light strand inside.
Optional: Wrap a bit of faux greenery or ribbon around the top for an extra festive touch.
These look incredible lining a hallway or sitting on a fireplace mantel.
6. Wine Glass Candle Trio
Time: 10 minutes (yes, really)
Vibe: Simple but fancy
You’ll need:
- Three wine glasses (different sizes look best)
- Small ornaments or snow for inside
- Small candles or tealights
How to make it:
- Flip the wine glasses upside down.
- Fill the bowl part (now the base) with ornaments or fake snow.
- Place a tealight on top of the base (now the top).
It’s so elegant — and shockingly easy. You can even write names on the glasses to double them as place cards.
Bonus: When your guests ask, “Where’d you buy these?” you can smugly say, “Oh, these? I made them.” 😉
7. Ice-Look Centerpiece (No Real Ice, Promise)
Time: 20 minutes
Vibe: Frosty elegance
You’ll need:
- A clear glass vase
- Clear acrylic gems or beads
- White flowers (faux or fresh)
- LED string lights
How to make it:
- Fill the vase halfway with clear gems.
- Tuck in string lights and weave through the gems.
- Add your white flowers on top.
The lights glow through the beads like frozen water — it’s beautiful, especially for evening gatherings.
8. Pinecone & Pearl Centerpiece
Time: 25 minutes
Vibe: Rustic glam (yes, that’s a thing)
You’ll need:
- Pinecones (spray-painted white or silver)
- A wide bowl or platter
- Faux pearls or small ornaments
- Optional: eucalyptus or greenery sprigs
How to make it:
- Arrange your pinecones in the bowl.
- Tuck pearls or ornaments between them.
- Add greenery for texture.
It’s nature-meets-elegance, and it smells subtly woodsy — perfect if you’re not into full sparkle overload.
9. Mini Winter Forest in a Cloche
Time: 30 minutes
Vibe: Whimsical, storybook
You’ll need:
- A glass cloche or large jar
- Mini bottle-brush trees or reindeer
- Faux snow
- Optional: fairy lights
How to make it:
- Sprinkle a base layer of faux snow.
- Arrange mini trees and figurines inside.
- Add tiny LED lights for that magical glow.
Every time I make one of these, I end up staring at it for way too long. It’s peaceful and nostalgic — like your own little world trapped under glass.
10. Silver & White Floral Arrangement
Time: 20 minutes
Vibe: Sophisticated, versatile, and timeless
You’ll need:
- White flowers (hydrangeas, roses, lilies — real or faux)
- Silver branches or accents
- A simple vase or bowl
- Optional: glitter spray or snow spray
How to make it:
- Arrange flowers loosely in the vase.
- Add silver accents and greenery.
- Mist lightly with glitter or faux snow spray.
It’s elegant, classic, and fits any winter event — weddings, parties, or just to elevate your kitchen table.
Bonus Tip: Layer Your Centerpieces
Here’s the secret sauce most people miss: combine a few of these ideas together.
For example:
- A mirror tray base + frosted jars + pinecones = Pinterest perfection.
- Or a snowy branch centerpiece surrounded by mini lanterns.
The layering gives depth and that “I hired a decorator” effect — when in reality, it was just you, some glue, and 30 minutes.
Quick Safety & Maintenance Tips
Because nothing ruins a Winter Wonderland faster than, well, actual fire.
- Always use LED candles near faux snow, ribbon, or greenery.
- Keep real flames clear of flammable materials.
- Dust or shake off fake snow occasionally (it gets clingy).
- Store fragile items in tissue or bubble wrap for next season.
My Winter Wonderland Setup (True Story)
Last year, I threw a “Winter Wonderland dinner” for friends. I made:
- One mirror tray centerpiece with frosted candles,
- A snowy branch display on the buffet, and
- A few wine glass candles on the side table.
Total time? About 90 minutes. Cost? Under $40.
My living room looked like a Hallmark movie set. And yes, I took about 40 pictures before anyone was allowed to eat. 😂
Wrap-Up: Your Home, Your Wonderland
You don’t need a professional decorator (or Elsa’s ice powers) to create something breathtaking. These DIY Winter Wonderland centerpieces prove that a few simple materials and 30 minutes of effort can completely transform your space.
So light those candles, sprinkle that fake snow, and let your creativity shine brighter than the fairy lights.
Your table’s about to become the centerpiece of your whole winter. ❄️
Now go make your own Winter Wonderland — one glittery jar at a time.